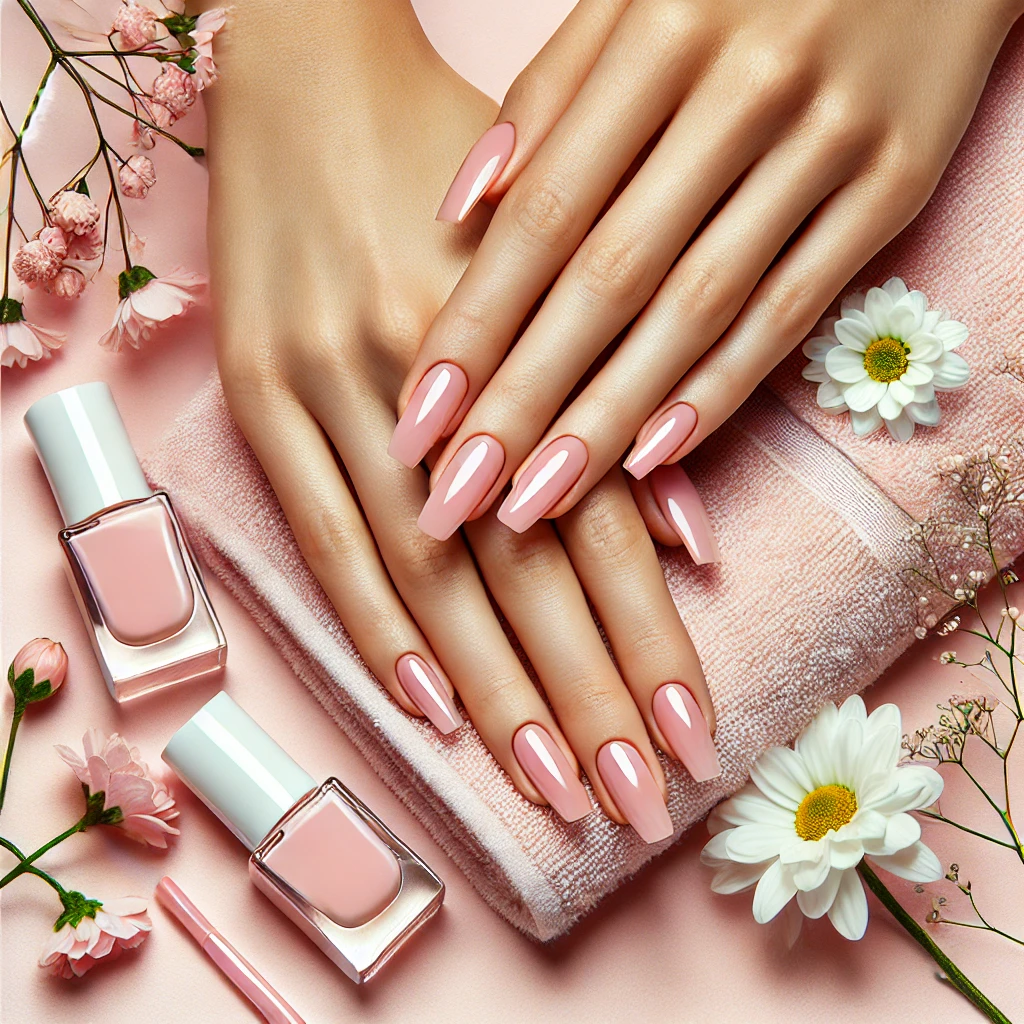
When you’re on the go, you don’t have time for constant nail touch-ups.
That’s why simple spring nails are the perfect choice—they look stylish, require low maintenance, and are easy to achieve anywhere.
Benefits of Travel-Friendly Spring Nails:
✔️ Quick & Easy – No need for salon visits!
✔️ Minimalist Yet Chic – Effortlessly complements any travel outfit.
✔️ Long-Lasting – With the right products, your nails can stay chip-free for days.
✔️ Versatile – Works for any destination, from city escapes to nature retreats.
DIY Simple Spring Nails: Easy At-Home Manicure
A salon-quality manicure doesn’t have to cost a fortune or take hours of your time.
With a little prep and the right products, you can achieve simple spring nails at home that look just as flawless as a professional job.
Whether you’re getting ready for a vacation or just want fresh nails that last, follow this easy step-by-step guide for a long-lasting, travel-friendly manicure.
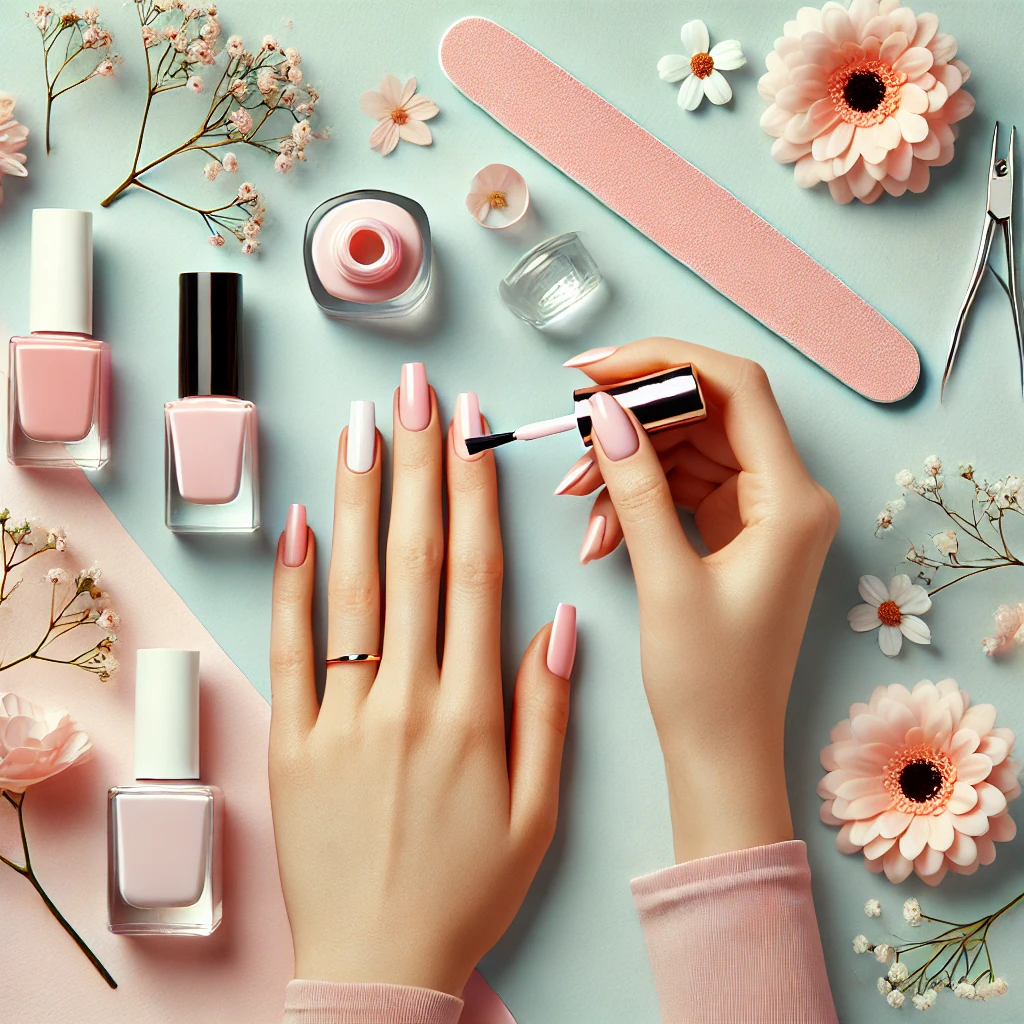
Step 1: Prep Your Nails for a Long-Lasting Finish
Proper nail prep is key to preventing chips and ensuring your manicure lasts through your spring travels. Here’s how to get your nails ready:
🔹 Trim & Shape Your Nails
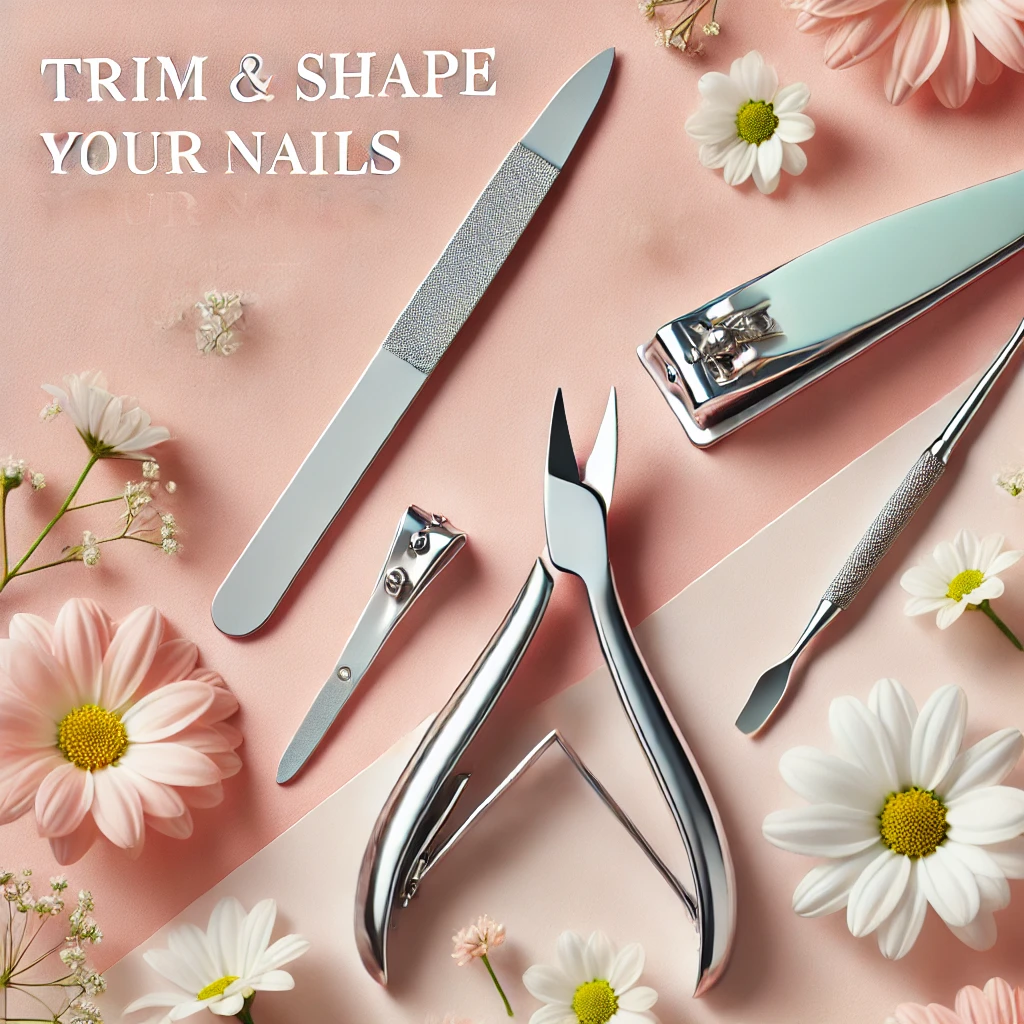
- Shorter nails are ideal for travel—they’re less likely to break and are easier to maintain.
- Use a nail clipper to trim, then a glass or crystal nail file to shape them into a natural, rounded or soft-square shape.
🔹 Buff & Smooth the Nail Surface
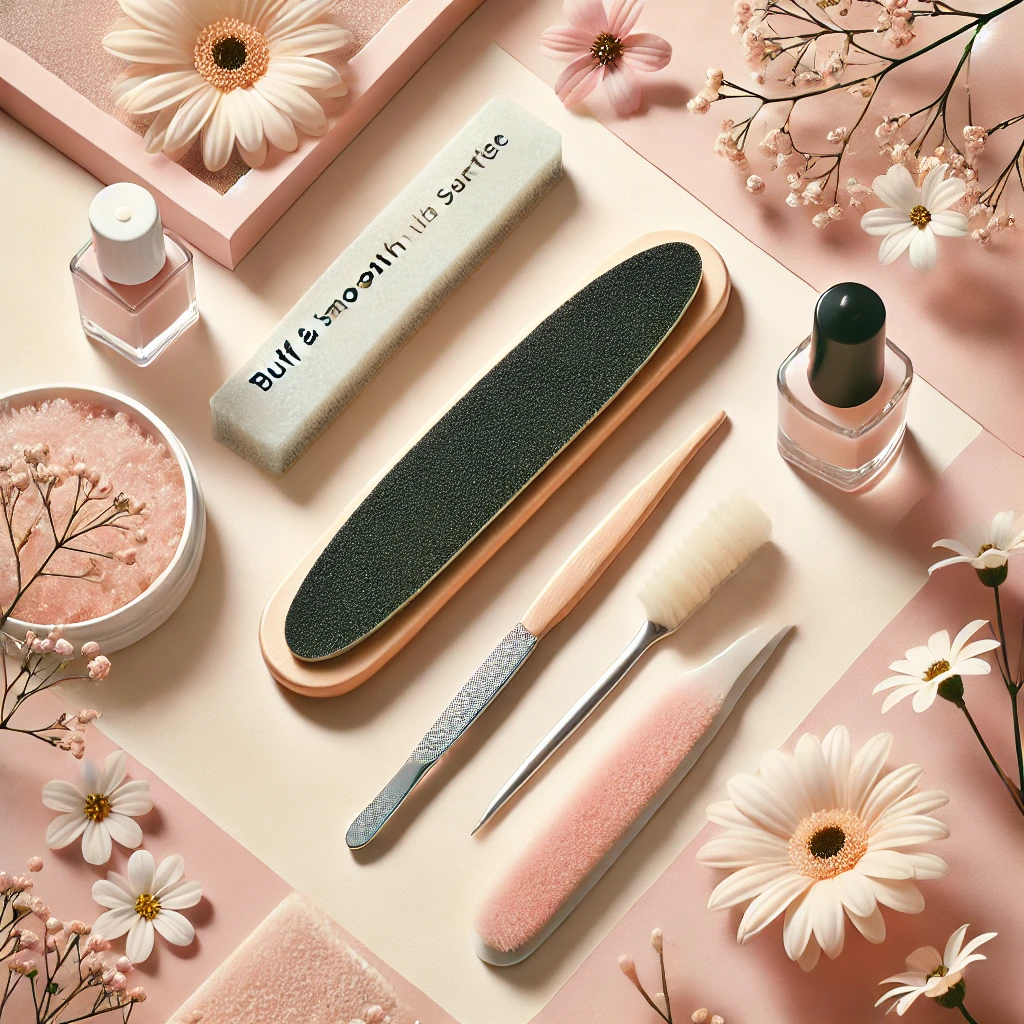
- A gentle nail buffer removes ridges and gives your polish a smooth, even base to adhere to.
- Avoid over-buffing, as it can weaken your nails.
🔹 Hydrate Your Cuticles
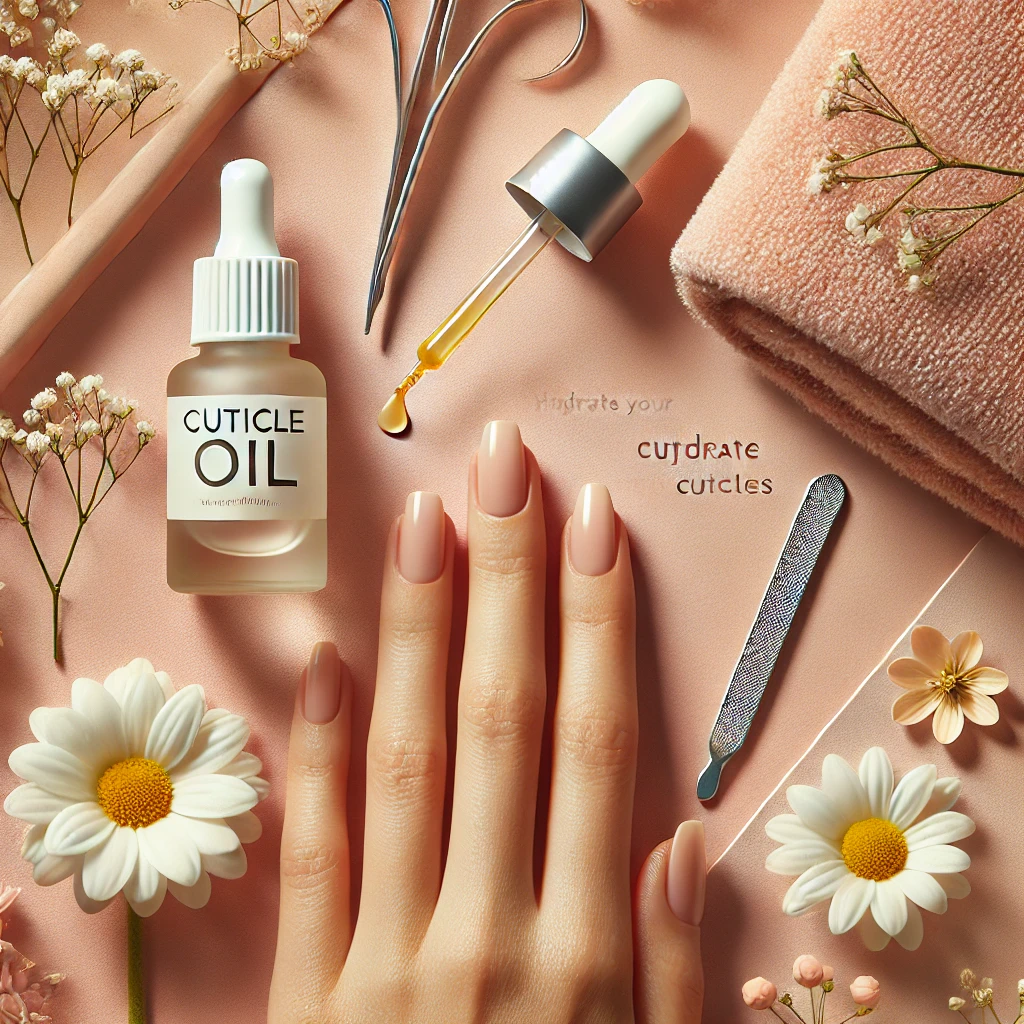
- Apply cuticle oil and gently push back your cuticles with a wooden stick or cuticle pusher.
- Healthy cuticles prevent polish from lifting and give a clean, polished look.
- Wipe off any excess oil before moving to the next step.
🔹 Apply a Strong Base Coat
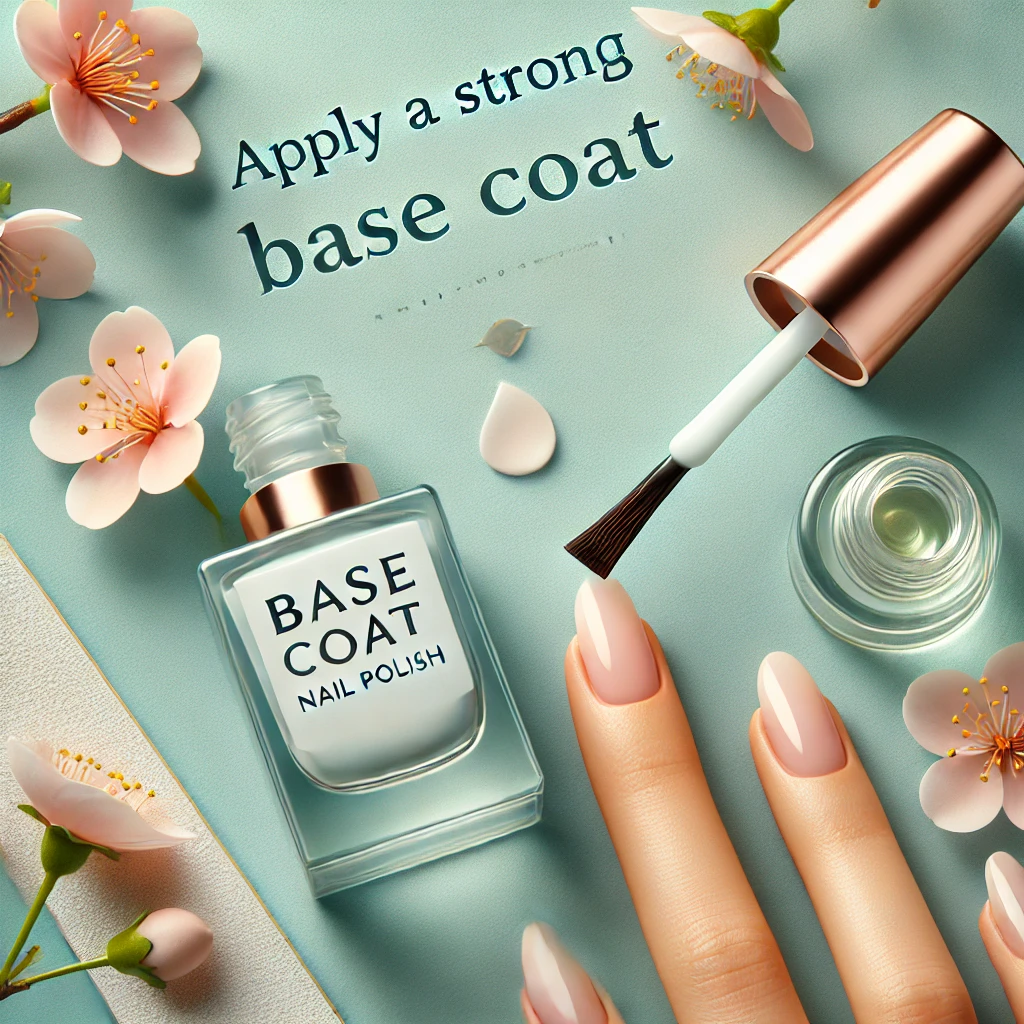
- A strengthening base coat not only prevents staining but also extends the life of your manicure.
- Look for a ridge-filling base coat if you have uneven nail texture.
- Let it dry completely before applying color.
(💡 Pro Tip: A sticky base coat grips the polish better, reducing chips while you’re on the go!)
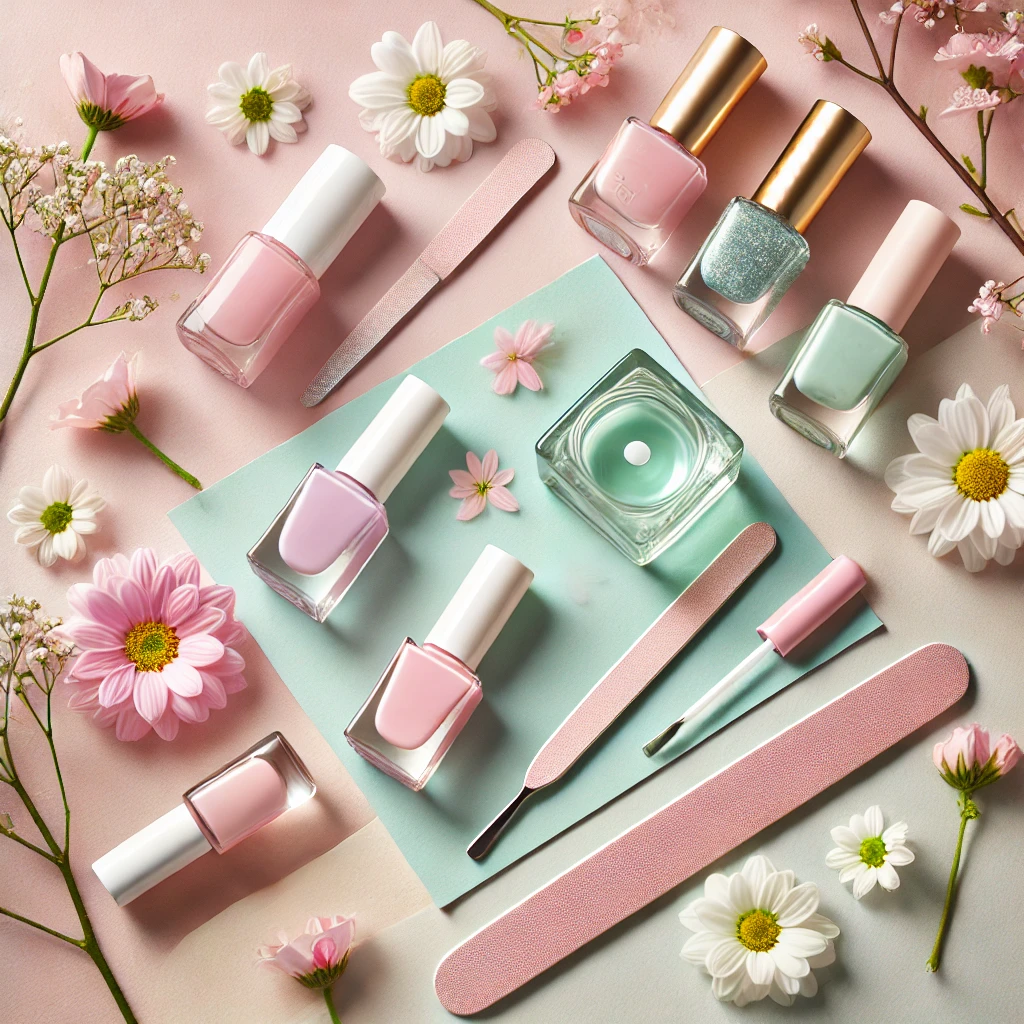
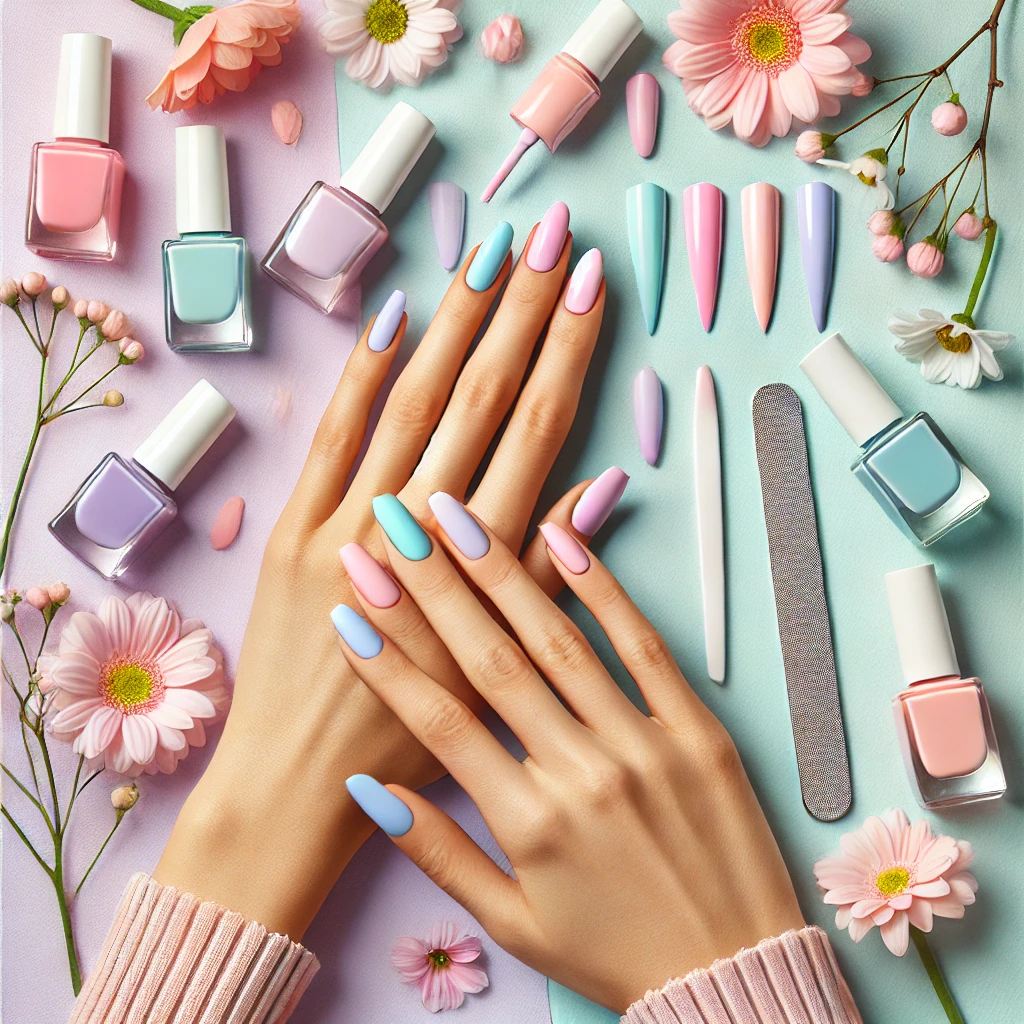
Step 2: Choose the Perfect Simple Spring Nail Colors
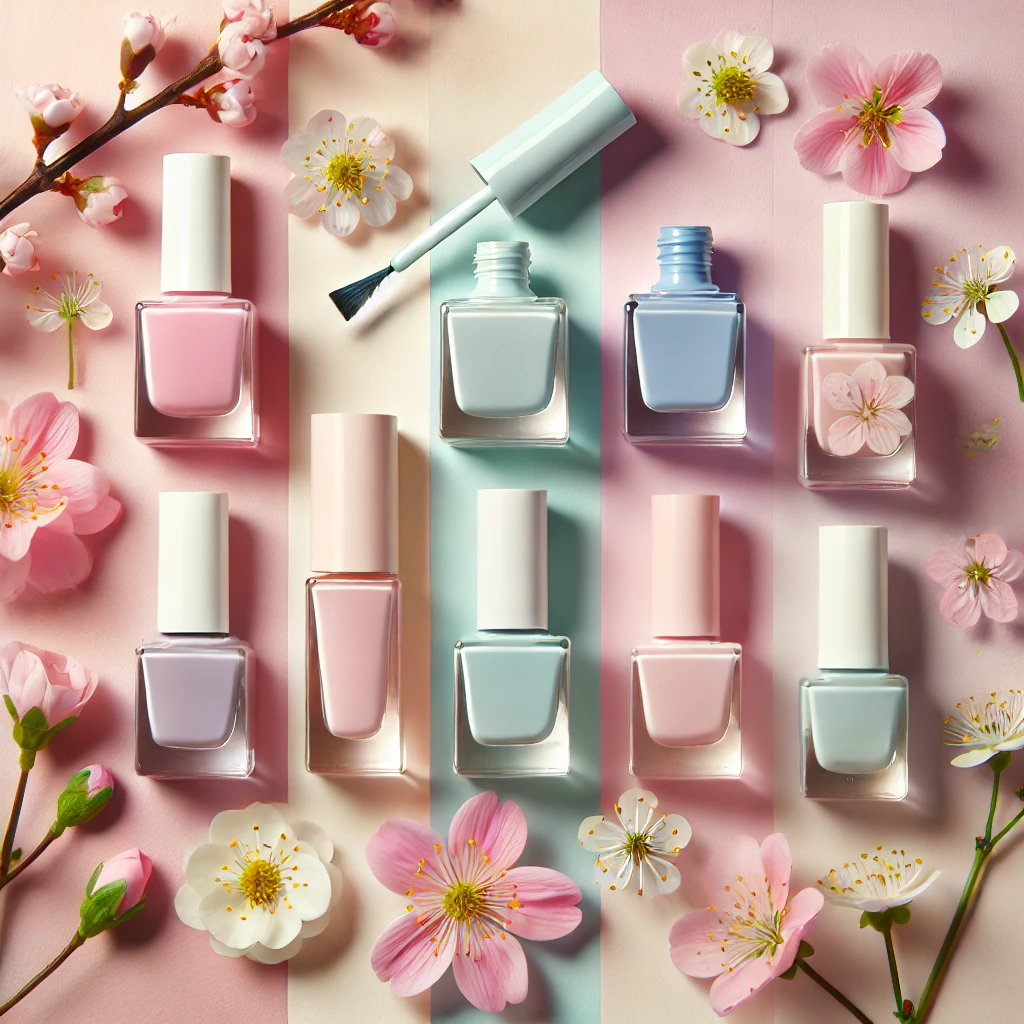
Spring is all about fresh, effortless beauty, and your nails should reflect that.
Here are some travel-friendly spring nail colors that complement any outfit and occasion:
🌸 Soft Pastels: Light pink, lavender, mint green, or baby blue for a dreamy, feminine touch.
🌿 Earthy Nudes: Beige, taupe, and light brown shades for a chic, understated look.
☀️ Sun-Kissed Corals: Peach, coral, or warm pinks that pop against sun-kissed skin.
✨ Shimmer & Sheer Tones: A subtle pearlescent finish adds a touch of elegance without being overpowering.
💅 Classic White & Neutrals: Crisp white, creamy ivory, or a sheer blush pink never go out of style.
(💡 Pro Tip: Opt for long-wearing, quick-dry formulas to minimize drying time and smudging!)
Step 3: Apply Nail Polish Like a Pro (No Chips Allowed!)
A great application technique makes all the difference. Follow these polish hacks to ensure a smooth, chip-resistant finish:
1️⃣ Apply Thin, Even Layers
- Thick coats take longer to dry and are more likely to smudge.
- Use three strokes per nail—one down the center, then one on each side.
2️⃣ Seal the Edges
- Always swipe the brush across the tip of your nail to create a protective barrier that prevents early chipping.
3️⃣ Let Each Coat Dry Completely
- If the first layer is still tacky, the second coat won’t adhere properly.
- Allow at least 2 minutes between coats for a long-lasting finish.
4️⃣ Finish with a High-Gloss, Long-Wear Top Coat
- A fast-drying top coat locks in color, adds shine, and protects against chips.
- For a gel-like effect without a UV lamp, use a plumping or extended-wear top coat.
(💡 Pro Tip: If you’re short on time, a quick-dry top coat sets your polish in under 60 seconds!)
Step 4: Nail Art Ideas for Effortless Spring Nails
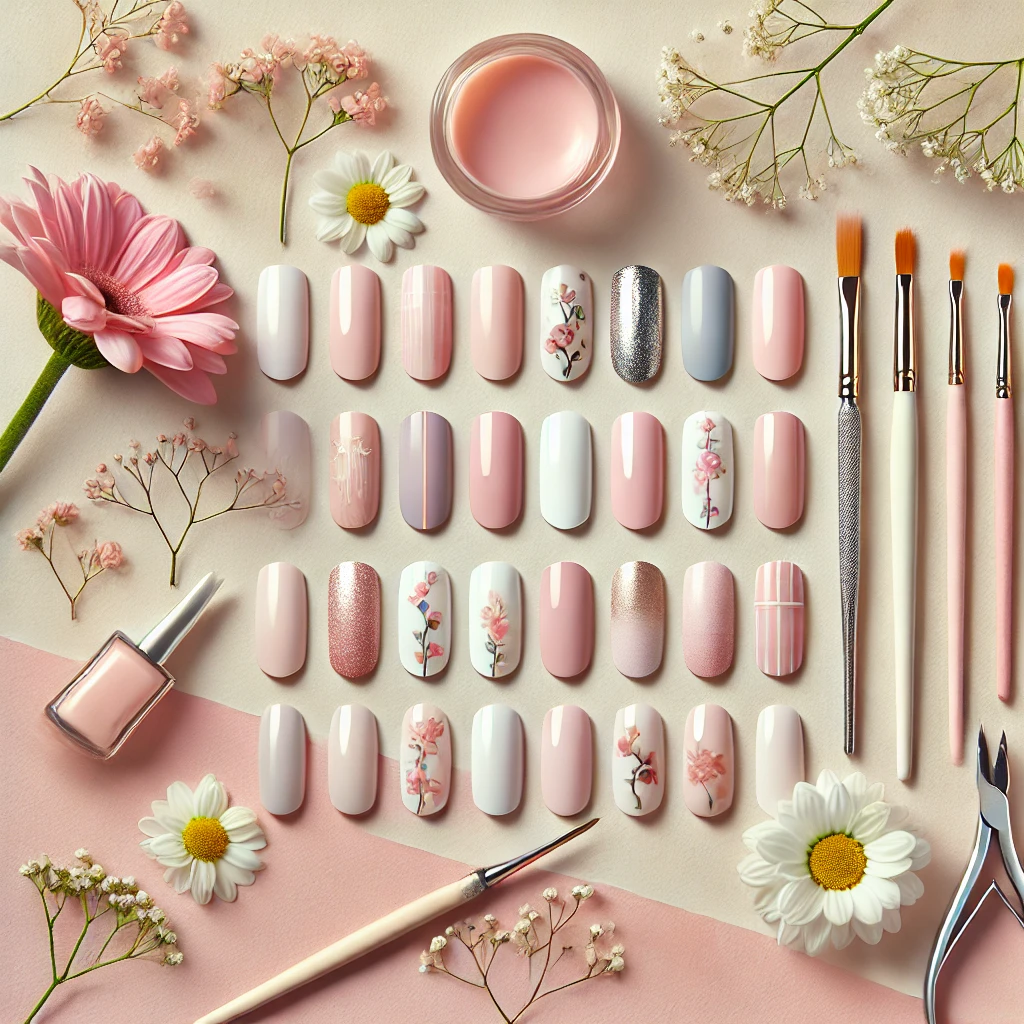
If you want to elevate your simple spring nails with minimalist nail art, try these easy designs:
🌼 Tiny Floral Accents – Add small daisy decals or use a dotting tool for effortless floral details.
🌀 Swirl Designs – Use a fine brush to create pastel swirls on a nude or white base.
✨ Subtle Glitter Gradient – Apply a fine shimmer polish near the tips for a soft ombré effect.
💖 French Tips with a Twist – Swap the traditional white tips for pastel or nude tones.
💅 Negative Space Nails – Leave parts of your nail unpainted for a modern, airy look.
(💡 Pro Tip: Nail stickers or press-ons are great alternatives for quick, travel-friendly designs!)
Step 5: Extend the Life of Your Manicure While Traveling
To keep your nails looking fresh and polished throughout your trip, follow these simple maintenance tips:
✔️ Reapply Top Coat Every 2-3 Days – This reinforces shine and durability.
✔️ Keep a Mini Nail File in Your Travel Bag – Smooths out any accidental chips on the go.
✔️ Use Cuticle Oil Daily – Hydrates nails and prevents cracks.
✔️ Avoid Using Your Nails as Tools – Opening soda cans or scratching off labels can weaken them.
✔️ Wear Gloves for Harsh Activities – Protect your nails when washing dishes or handling luggage.
4️⃣ Finish with a Top Coat – A fast-drying, long-lasting top coat locks in shine and durability.
(Recommended: A gel-like top coat that extends wear without a UV lamp.)
Best Nail Products for Long-Lasting Simple Spring Nails
If you want your simple spring nails to stay flawless throughout your travels, choosing the right nail products is just as important as technique.
Whether you’re going for a soft pastel manicure or a chic neutral look, these must-have products will keep your nails chip-free, glossy, and travel-ready.
1. Travel-Sized Nail Kit (For On-the-Go Fixes)
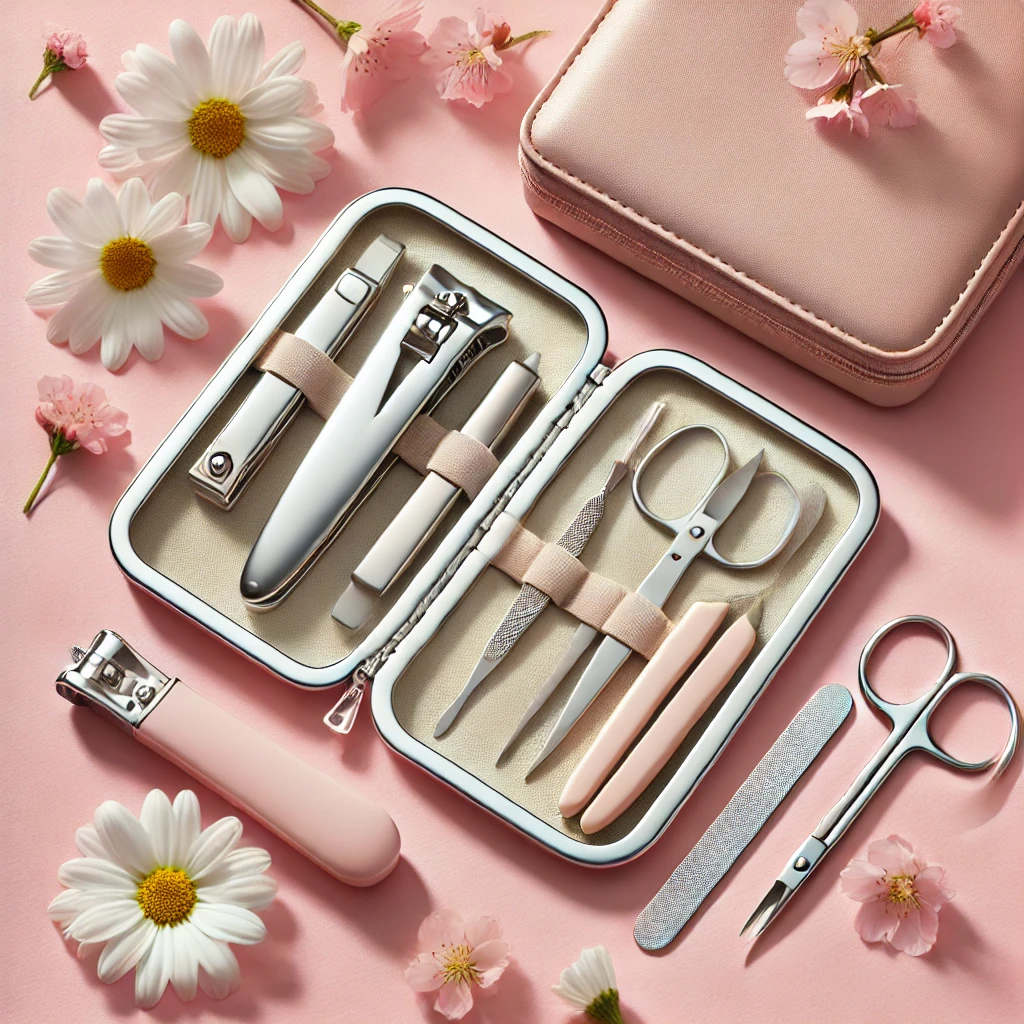
A compact nail kit is a lifesaver when you’re on the road.
It ensures you have all the essentials to shape, file, and fix minor nail emergencies—whether you’re in an airport, on a road trip, or at a beach resort.
What to Look For:
✔️ TSA-friendly size – Easily fits into your carry-on.
✔️ Durable tools – Stainless steel clippers, cuticle pushers, and scissors.
✔️ Multi-functional – Some sets include tweezers and eyebrow scissors for extra convenience.
💡 Pro Tip: Look for a lightweight case that snaps shut securely to prevent spills in your bag!
🔗 [Recommended: A high-quality, all-in-one nail kit with professional tools.]
2. Strengthening Base Coat (To Prevent Peeling & Chipping)
A good base coat is the secret to a long-lasting manicure.
It not only helps the nail polish adhere better but also protects your nails from staining and breakage.
Why It’s a Must-Have:
✔️ Extends polish wear – Helps your manicure last up to 7-10 days without chipping.
✔️ Strengthens nails – Fortifies weak or brittle nails.
✔️ Smooths ridges – Creates an even surface for flawless polish application.
💡 Pro Tip: If your nails are prone to peeling, choose a rubberized or gripping base coat for extra adhesion.
🔗 [Recommended: A ridge-filling, strengthening base coat that boosts nail health.]
3. Quick-Dry Nail Polish (For Easy, Mess-Free Application)

No one wants to wait 30 minutes for their nails to dry—especially when packing for a trip!
A quick-dry formula allows you to apply multiple coats effortlessly without smudging or denting.
Best Travel-Friendly Colors for Spring:
🌸 Soft Pastels – Light pink, lavender, mint, baby blue.
🌿 Nude & Neutrals – Beige, taupe, soft brown.
☀️ Vibrant Spring Hues – Peach, coral, soft yellow.
✨ Sheer Glossy Finishes – For a subtle, natural look.
💡 Pro Tip: Look for 5-free or 10-free nail polishes to avoid harsh chemicals and keep nails healthy.
🔗 [Recommended: A fast-drying, chip-resistant polish with a wide range of spring shades.]
4. Long-Wear Top Coat (For a Gel-Like Shine Without UV Light)
A top coat is essential to lock in color, add shine, and prevent chips—especially during travel.
The best options offer gel-like protection without needing a UV lamp.
Features to Look For:
✔️ Quick-drying – Dries in under 60 seconds.
✔️ Chip-resistant – Keeps nails looking fresh for 7+ days.
✔️ High-gloss finish – For a salon-quality look.
💡 Pro Tip: Reapply a thin layer every 2-3 days to keep your nails shiny and strong throughout your trip.
🔗 [Recommended: A long-wear, high-gloss top coat that extends manicure life.]
5. Nail Polish Remover Wipes (For Hassle-Free Polish Changes)
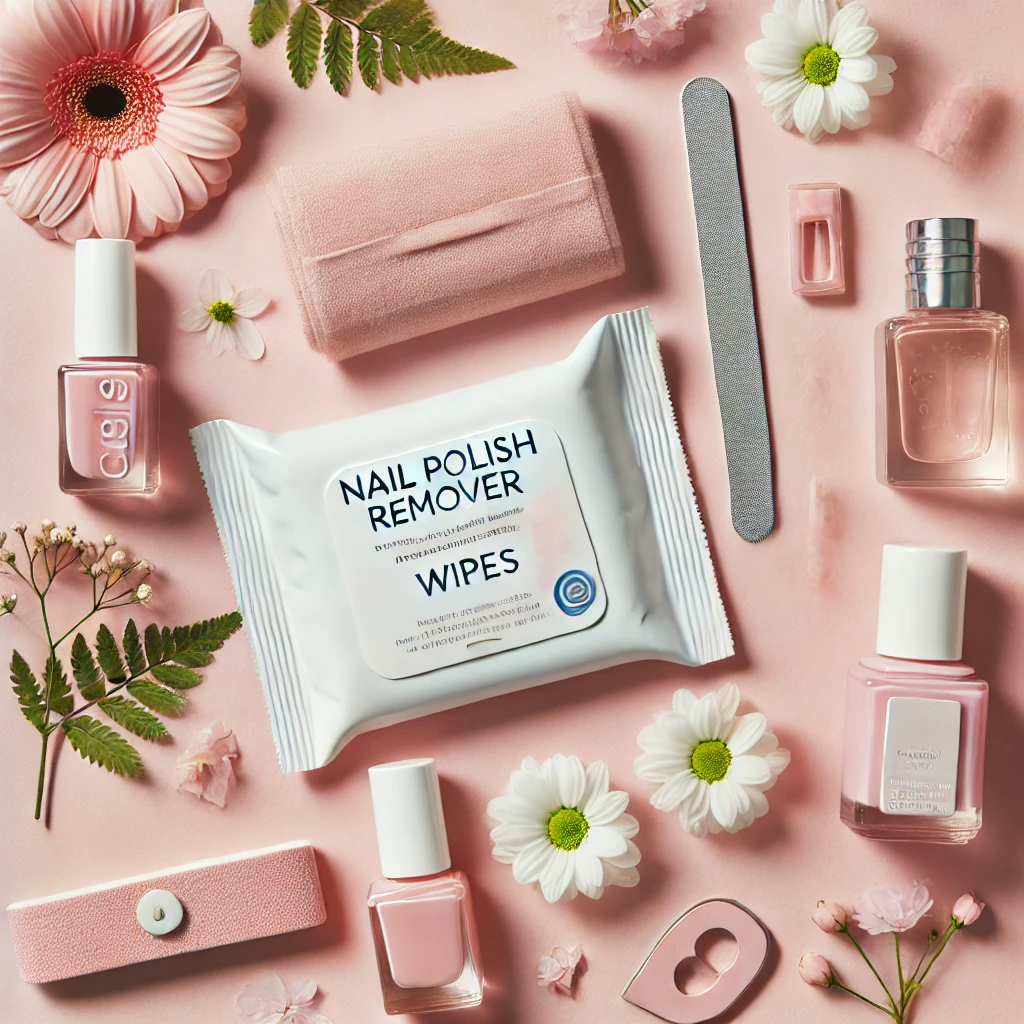
Instead of carrying a bulky bottle of liquid remover, nail polish remover wipes are the perfect travel-friendly alternative.
They’re compact, mess-free, and work quickly without drying out your nails.
Why They’re a Travel Essential:
✔️ No spills or leaks – Unlike liquid removers.
✔️ Moisturizing formula – Many include aloe or vitamin E to prevent dryness.
✔️ Easy to use – Great for quick polish changes on the go.
💡 Pro Tip: Choose acetone-free wipes if you have sensitive nails, or acetone-based wipes for fast removal of dark colors.
🔗 [Recommended: A pack of portable nail polish remover wipes with moisturizing ingredients.]
6. Cuticle Oil Pen (To Keep Nails Hydrated & Healthy)
Dry cuticles can cause peeling, cracks, and shorten the life of your manicure.
A cuticle oil pen is a must-have for keeping nails nourished without mess or greasy residue.
Best Features to Look For:
✔️ Portable & leak-proof – Perfect for tossing in your bag.
✔️ Fast-absorbing formula – No greasy feel.
✔️ Nourishing ingredients – Look for jojoba oil, vitamin E, and almond oil.
💡 Pro Tip: Apply a tiny drop to each nail before bed to keep your nails looking healthy throughout your trip.
🔗 [Recommended: A lightweight, travel-friendly cuticle oil pen for deep hydration.]
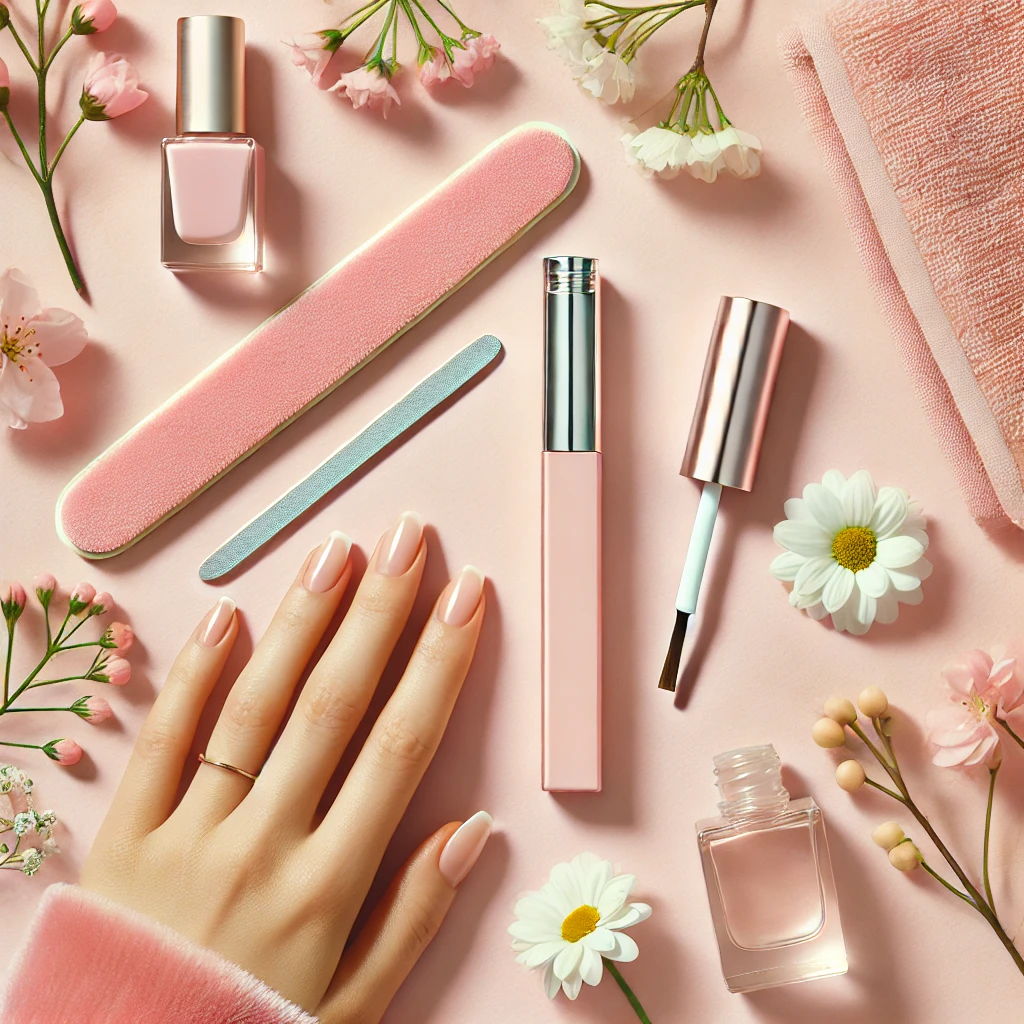
7. Glass Nail File (For Smoother, Healthier Nails)
A glass nail file is the best investment for maintaining strong, healthy nails without causing splitting or peeling.
Unlike traditional emery boards, glass files last longer and provide a smooth edge.
Why You Need One in Your Travel Kit:
✔️ Gentler on nails – Prevents rough edges and breakage.
✔️ Washable & reusable – More hygienic than regular files.
✔️ Lasts for years – Doesn’t wear down like disposable files.
💡 Pro Tip: Look for a travel case to protect the file in your purse or luggage.
🔗 [Recommended: A premium glass nail file with a protective case.]
Your Ultimate Nail Essentials for Long-Lasting Simple Spring Nails
With the right long-wearing nail polish, top coat, and strengthening base coat, your simple spring nails can last through all your travel adventures without constant touch-ups.
To keep your nails looking fresh, make sure you pack:
✅ A travel-sized nail kit for quick fixes.
✅ A quick-dry nail polish for mess-free application.
✅ A strengthening base coat to prevent chipping.
✅ A high-gloss top coat to lock in shine.
✅ Cuticle oil & nail wipes for hydration and easy polish changes.
By investing in the right travel-friendly nail products, you’ll always have picture-perfect nails—no matter where your journey takes you!
💬 What’s your must-have nail product for travel? Drop your favorites in the comments below!
Low-Maintenance Simple Spring Nail Designs for Travelers
When you’re on the go, you want simple spring nails that are stylish, low-maintenance, and durable.
Whether you’re off to a tropical paradise, a city escape, or a weekend getaway, these travel-friendly nail designs will keep your nails looking effortlessly chic without constant touch-ups.
From minimalist pastels to easy DIY nail art, these low-maintenance looks are perfect for travel lovers who want to look polished with minimal effort.
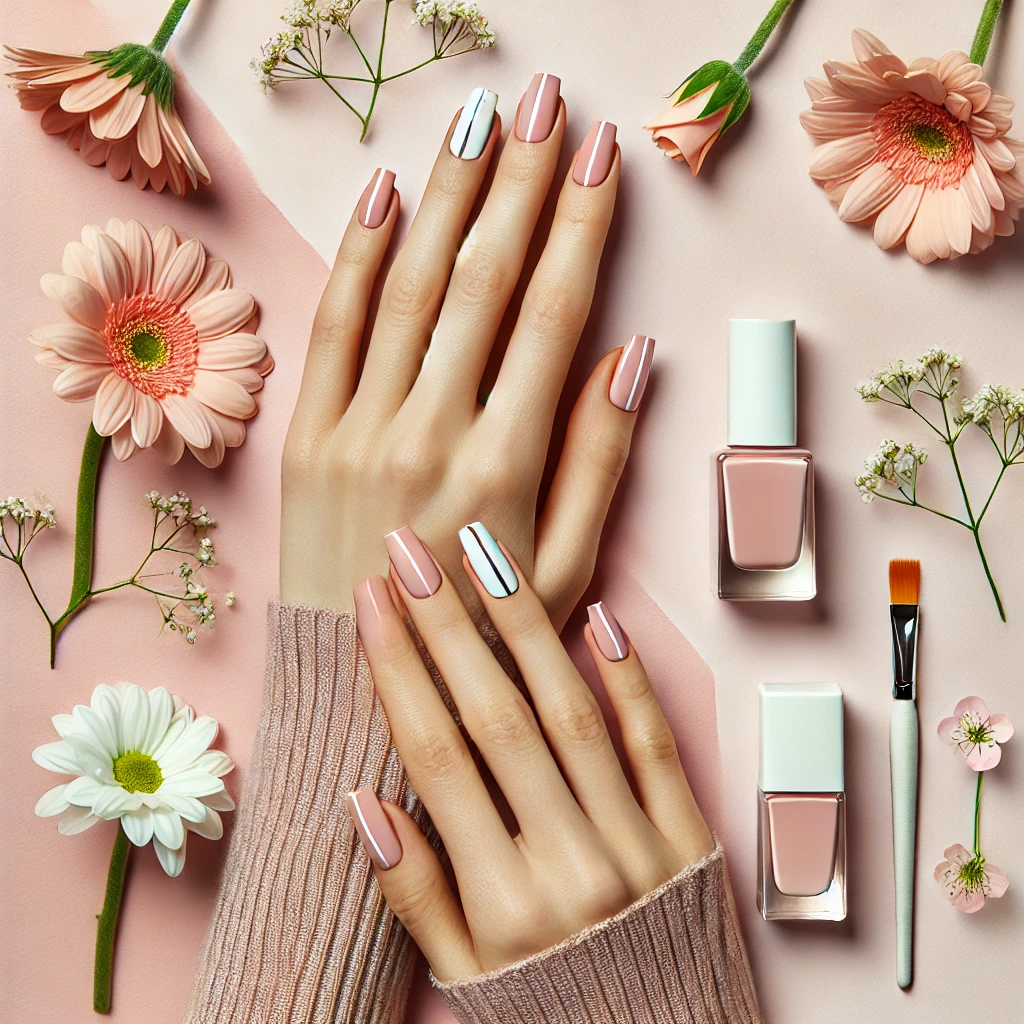
1. Minimalist French Tips (A Chic Twist on the Classic Manicure)
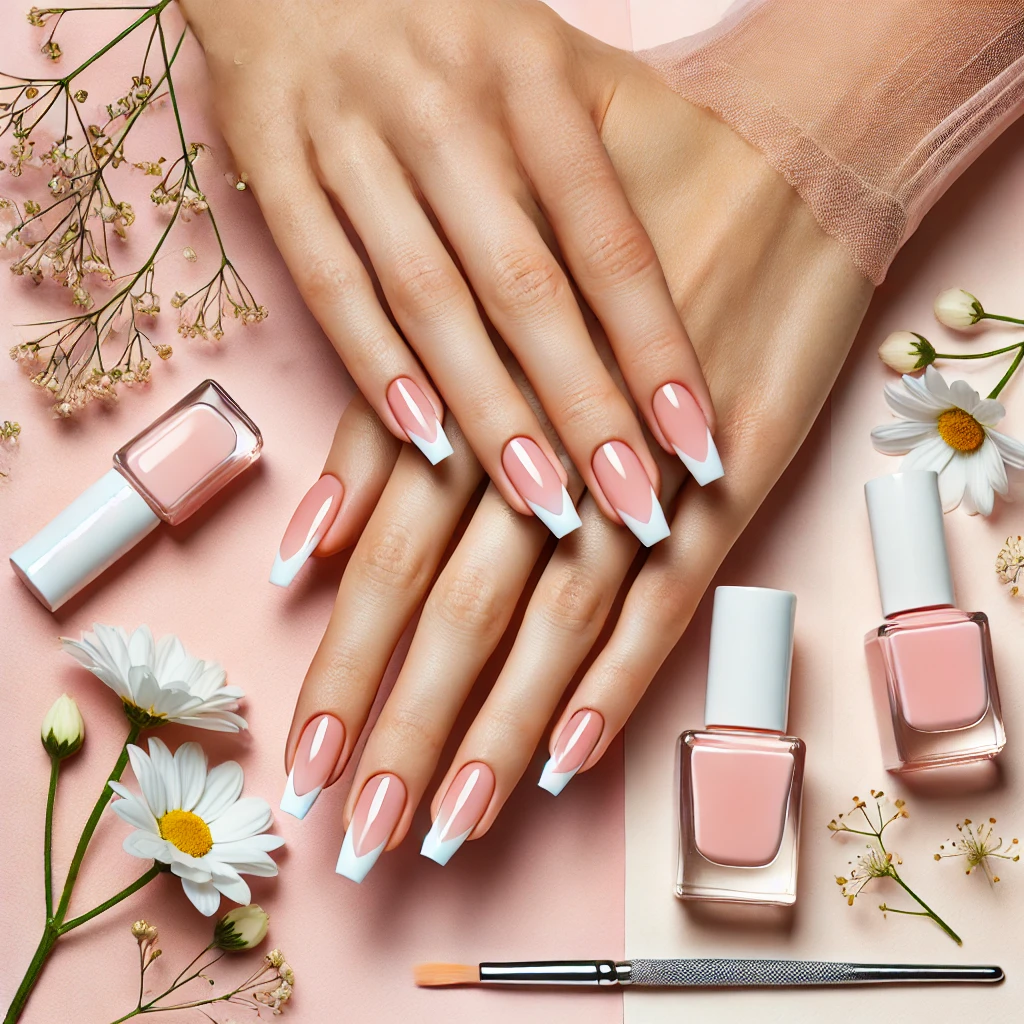
The French manicure is a timeless, versatile look that pairs well with any outfit or destination.
Instead of the traditional white tips, modern French nails use soft pastels, nude shades, or even metallics for a subtle twist.
Why It’s Perfect for Travel:
✔️ Grows out beautifully – No harsh regrowth lines.
✔️ Neutral & sophisticated – Matches any travel wardrobe.
✔️ Easy to DIY – Use nail stickers or a fine brush for a precise finish.
💡 Pro Tip: For an ultra-natural look, try a sheer pink or nude base with delicate white micro-tips.
🔗 [Recommended: A precision nail brush for easy DIY French tips.]

2. Sheer Glossy Nails (The Ultimate “Clean Girl” Aesthetic)
If you love the no-makeup makeup look, this is the nail equivalent! A sheer pink, nude, or clear polish with a glossy finish gives an effortlessly polished vibe without requiring touch-ups.
Why It’s Perfect for Travel:
✔️ No visible chipping – Sheer shades are forgiving.
✔️ Quick to apply & dries fast – Perfect for last-minute manicures.
✔️ Pairs well with any look – From casual to dressy.
💡 Pro Tip: Use a gel-like top coat to add long-lasting shine and durability.
🔗 [Recommended: A high-shine, sheer nail polish for a natural glow.]
3. Tiny Floral Accents (Effortlessly Feminine & Spring-Ready)
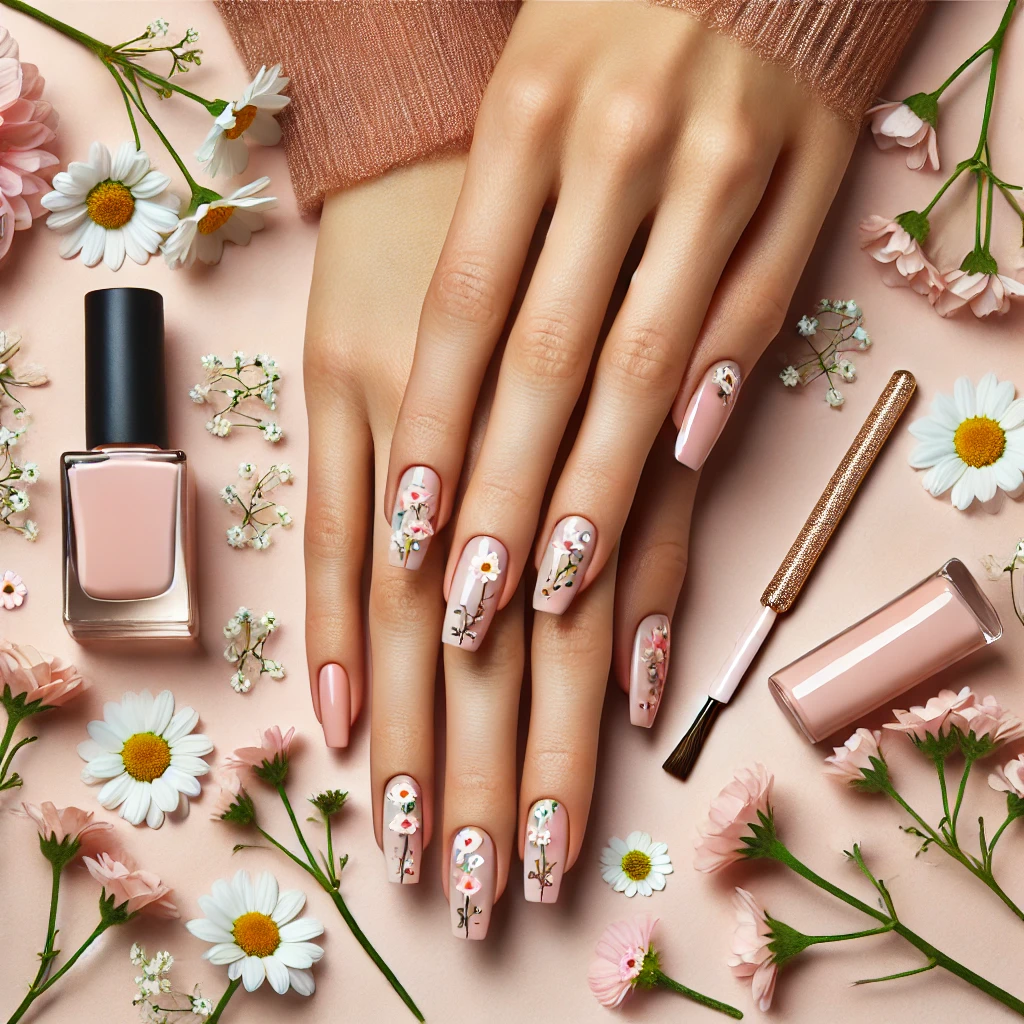
Nothing says spring like dainty floral nail art! If you love a touch of artsy elegance, opt for a neutral or pastel base with tiny floral decals for a travel-friendly, low-maintenance design.
Why It’s Perfect for Travel:
✔️ Minimalist yet stylish – A tiny floral accent adds charm without being overpowering.
✔️ Long-wearing – Decals last longer than intricate hand-painted designs.
✔️ Easy to DIY – Apply floral stickers or use a dotting tool for simple petals.
💡 Pro Tip: Press-on nail sets with floral designs are a great option for easy, no-dry-time manicures.


🔗 [Recommended: A set of travel-friendly floral nail stickers.]
4. Gradient Ombre Nails (Soft & Subtle Blended Colors)
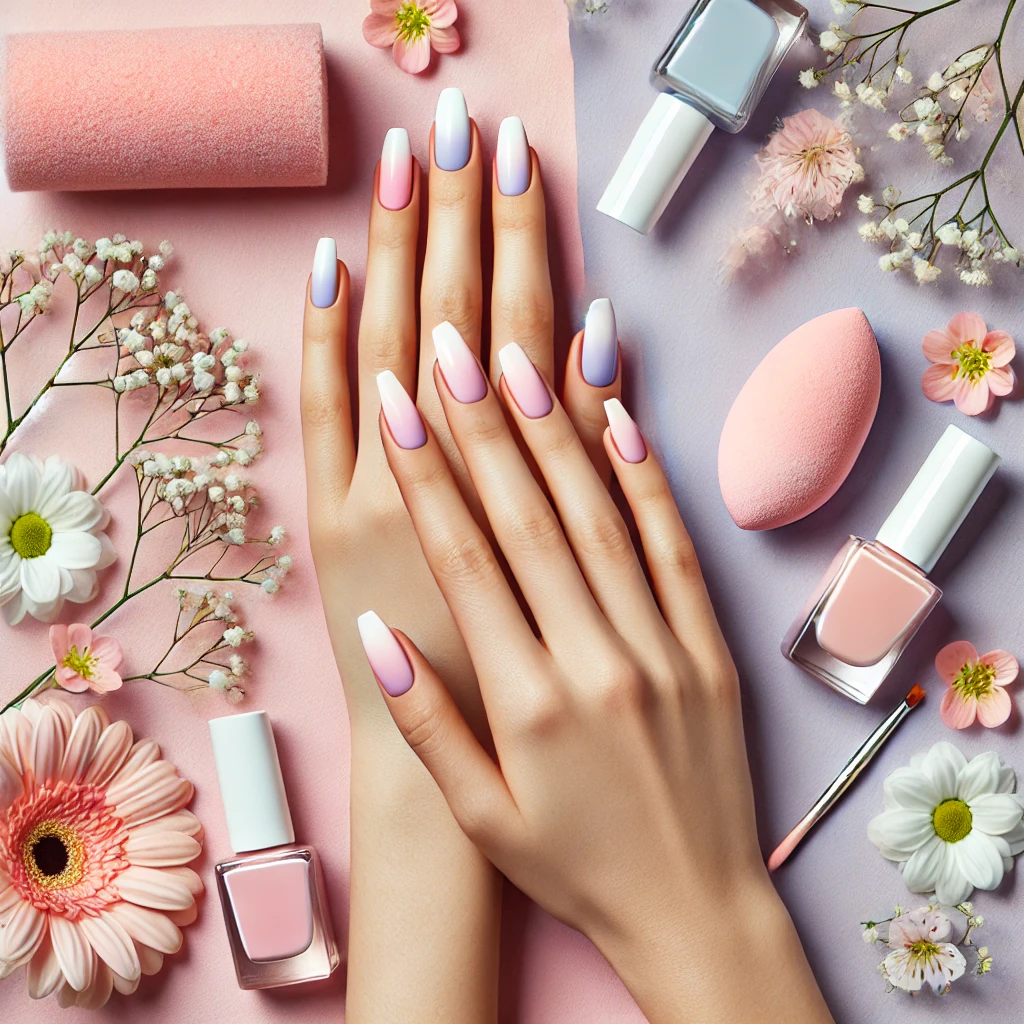
Ombre nails blend two or more colors seamlessly for a soft, dimensional look.
Pastel-to-white gradients or peachy sunset ombres are especially dreamy for spring!
Why It’s Perfect for Travel:
✔️ Grows out beautifully – No sharp regrowth lines.
✔️ Forgiving if chipped – The blended effect hides imperfections.
✔️ Great for any destination – Beachy, urban, or nature-inspired looks.
💡 Pro Tip: Use a makeup sponge to dab on layers of polish for a smooth ombre effect.

🔗 [Recommended: A set of travel-sized makeup sponges for DIY ombre nails.]
5. Negative Space Nails (Modern & Low-Maintenance Chic)
Negative space nail art leaves part of your nail unpainted, creating a minimalist and edgy yet elegant look.
This design is ideal for travel because it reduces the appearance of regrowth and lasts longer without chipping.
Why It’s Perfect for Travel:
✔️ No need for touch-ups – The unpainted sections disguise any wear and tear.
✔️ Minimal yet stylish – Looks high-end without being complicated.
✔️ Matches any travel outfit – Works with any color palette.
💡 Pro Tip: Try a nude or clear base with pastel or white geometric lines for a sleek look.

🔗 [Recommended: A fine nail art brush set for precise negative space designs.]
6. Soft Shimmer Nails (A Touch of Sparkle Without the Hassle)
For a subtle but eye-catching effect, choose a neutral or pastel polish with a fine shimmer.
This adds dimension without the bulk of chunky glitter.
Why It’s Perfect for Travel:
✔️ Soft shimmer catches the light beautifully.
✔️ Disguises small chips – The light-reflecting effect makes imperfections less noticeable.
✔️ Low-maintenance glam – Adds elegance without requiring nail art skills.
💡 Pro Tip: Choose a pearly or iridescent shimmer polish for a sophisticated, airy spring look.

🔗 [Recommended: A sheer shimmer nail polish for a luminous finish.]
7. Pastel Skittle Nails (A Playful, Travel-Friendly Color Mix)
Can’t pick just one color? Skittle nails feature a different shade on each nail for a fun, playful spring aesthetic.
Opt for soft pastel tones to keep the look cohesive and elegant.
Why It’s Perfect for Travel:
✔️ No need for intricate designs – Just paint each nail a different color.
✔️ Works with multiple outfits – A mix of colors means your nails match everything!
✔️ Great for spring & summer vibes – Bright yet soft tones elevate your travel photos.
💡 Pro Tip: Stick to pastels or tonal shades (e.g., different shades of pink or blue) for a harmonious look.

🔗 [Recommended: A pastel nail polish set for easy Skittle nails.]
8. Press-On Nails (The Ultimate Zero-Effort Solution!)
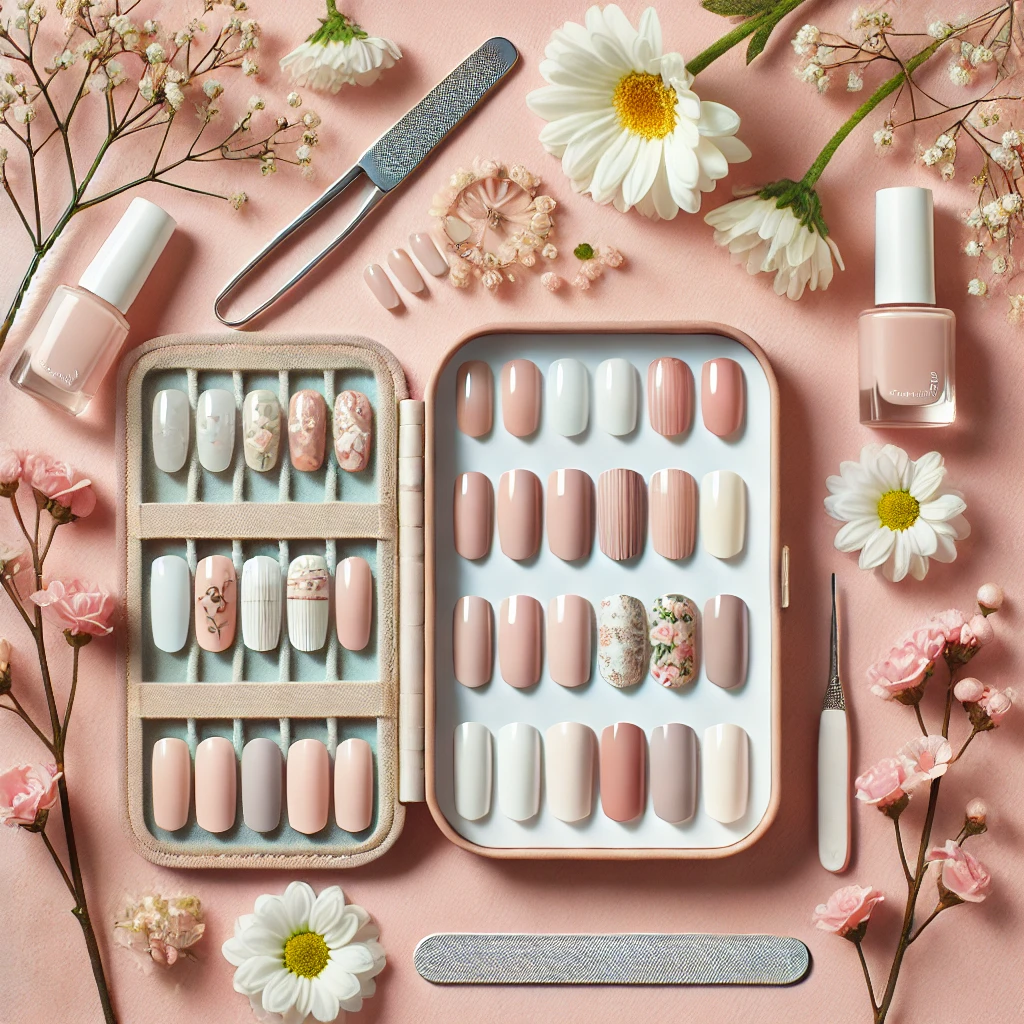
If you want perfect nails in minutes, press-ons are your best friend!
Today’s modern press-ons look just like salon-quality manicures without the drying time or commitment.

Why It’s Perfect for Travel:
✔️ No drying time – Instant gorgeous nails!
✔️ Reusable & long-wearing – Lasts up to two weeks with proper application.
✔️ Easy to swap out – Switch styles effortlessly during your trip.
💡 Pro Tip: Choose short or medium-length press-ons for a more natural, travel-friendly feel.
🔗 [Recommended: A travel-friendly press-on nail set for easy manicures.]
Here’s your travel nail checklist:
✅ A fast-drying, chip-resistant nail polish
✅ A long-wear top coat for durability
✅ Floral nail stickers or press-ons for quick glam
✅ A mini nail kit for on-the-go fixes
Now you’re ready to travel in style with perfect nails!
💬 Which of these spring nail designs is your favorite?
Share your go-to travel nail look in the comments!
How to Keep Your Nails Looking Fresh While Traveling
You’ve perfected your simple spring nails—now the challenge is keeping them looking fresh throughout your trip!
Whether you’re exploring bustling cities, lounging on the beach, or hiking through scenic landscapes, your nails are exposed to daily wear and tear.
The good news?
With a few travel-friendly nail care tips, you can maintain a flawless manicure and avoid chipped, broken, or dull nails.
Here’s how to keep your nails fresh, glossy, and travel-ready—with minimal effort!
1. Apply a Top Coat Every 2-3 Days (Your #1 Defense Against Chipping!)
A high-quality top coat is essential for locking in color, preventing chips, and maintaining shine.
The best top coats act as a protective shield, keeping your nails looking freshly done for days.
How to Use It Effectively:
✔️ Apply a thin layer every 2-3 days to reinforce protection.
✔️ Seal the tips of your nails with the top coat to prevent peeling.
✔️ Choose a fast-drying formula to save time.
💡 Pro Tip: If you’re short on time, opt for a gel-like top coat that extends wear without a UV lamp.
🔗 [Recommended: A chip-resistant, high-shine top coat for long-lasting nails.]
2. Keep a Mini Nail File Handy for Quick Fixes
A small glass nail file is a travel must-have! It helps smooth out chips and snags before they turn into full-blown breaks.
Why It’s a Travel Essential:
✔️ Prevents further nail damage by filing down rough edges immediately.
✔️ Compact & travel-friendly – Fits in any purse or carry-on.
✔️ More durable than disposable emery boards.
💡 Pro Tip: Glass files seal the nail edge, preventing peeling and splitting better than traditional files.
🔗 [Recommended: A high-quality glass nail file with a protective case.]
3. Moisturize Daily to Prevent Dryness & Peeling
Traveling—especially flying—dehydrates your skin and nails, making them more prone to breakage.
Regular hydration keeps your cuticles soft and prevents your nails from becoming brittle.
How to Keep Nails Hydrated:
✔️ Use cuticle oil daily – It strengthens nails and prevents cracks.
✔️ Apply hand cream – Look for formulas with shea butter, vitamin E, or jojoba oil.
✔️ Drink plenty of water – Hydration from within is key for healthy nails!
💡 Pro Tip: A cuticle oil pen is perfect for on-the-go hydration without mess.
🔗 [Recommended: A travel-friendly cuticle oil pen for deep hydration.]
4. Avoid Using Your Nails as Tools
It’s tempting to use your nails to open a soda can, peel off labels, or scratch something off a surface, but these small actions weaken your nails and cause breakage.
Simple Ways to Protect Your Nails:
✔️ Use the side of your finger instead of your nails to open cans.
✔️ Carry a small pocket knife or keychain tool for tasks like opening packages.
✔️ Opt for shorter, rounded nails if you know you’ll be using your hands a lot.
💡 Pro Tip: Keeping your nails shorter while traveling reduces the risk of breakage.
5. Wear Gloves for Harsh Activities
If your travels involve cold weather, hiking, swimming, or handling rough luggage, wearing gloves can protect your nails from damage.
When to Wear Gloves:
✔️ During flights – Helps prevent excessive dehydration from cabin air.
✔️ While doing dishes or laundry – Prevents exposure to harsh detergents.
✔️ When hiking or engaging in outdoor activities – Reduces stress on nails.
💡 Pro Tip: If you don’t want to wear gloves, apply a thick hand cream or cuticle balm before bed for deep hydration.
🔗 [Recommended: A nourishing hand cream that protects against dryness.]
6. Choose Nail Polish Colors That Hide Chips
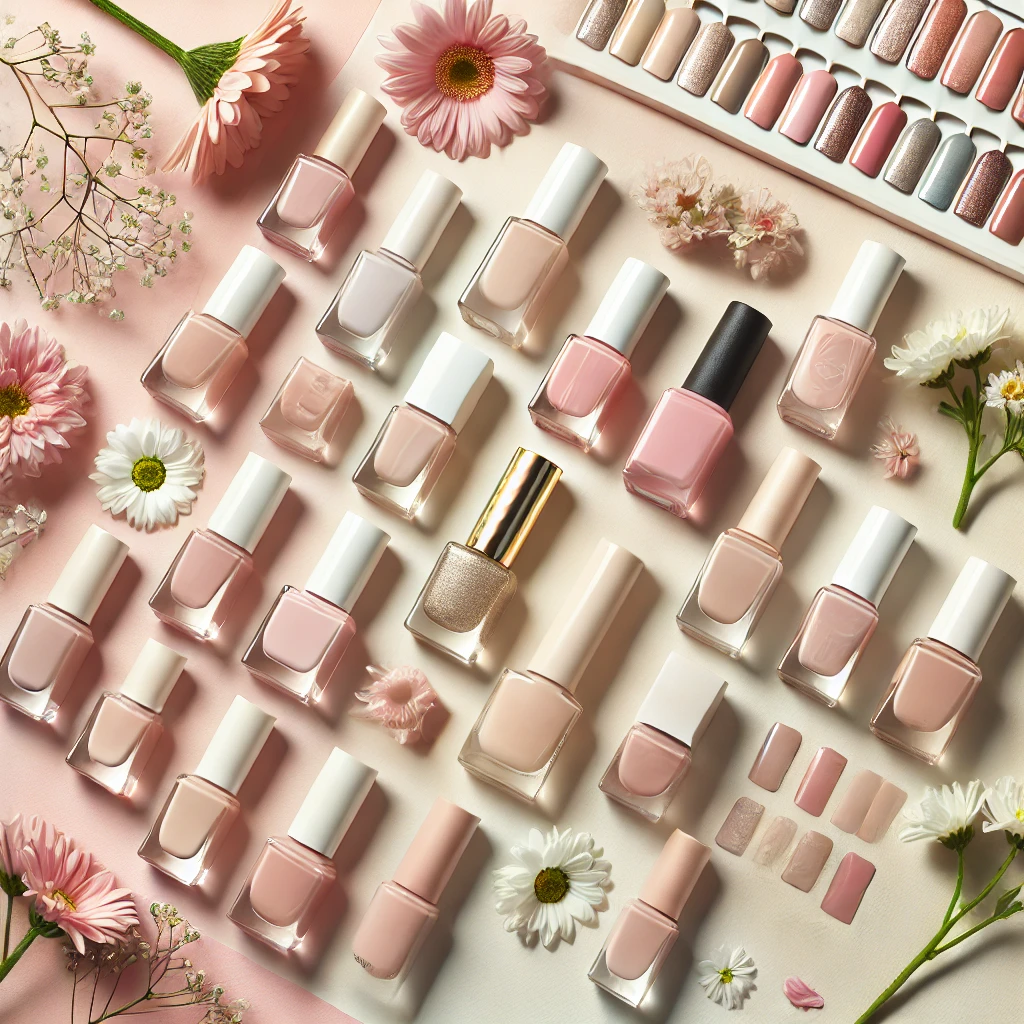
Some nail colors make chips way more noticeable than others.
Opting for lighter or neutral tones can extend the life of your manicure by making small imperfections less obvious.
Best Travel-Friendly Nail Colors:
🌸 Soft Pastels – Light pink, lavender, baby blue.
🌿 Nude & Neutral Shades – Beige, taupe, soft brown.
✨ Sheer & Glossy Finishes – Helps disguise chips effortlessly.
💡 Pro Tip: If you love dark colors, bring a mini bottle of polish for quick touch-ups!
🔗 [Recommended: A set of long-wear pastel nail polishes.]
7. Carry Nail Polish Remover Wipes for Emergency Fixes
Instead of carrying a bulky bottle of nail polish remover, use pre-soaked remover wipes for easy, mess-free polish changes on the go.
Why Nail Wipes Are a Travel Must-Have:
✔️ TSA-approved & spill-proof – No leaks in your bag.
✔️ Quick & convenient – Removes polish in one swipe.
✔️ Moisturizing formulas available – Prevents nails from drying out.
💡 Pro Tip: Choose acetone-free wipes for gentle removal or acetone-based wipes for tougher polishes.
🔗 [Recommended: A pack of travel-friendly nail polish remover wipes.]
8. Pack Press-On Nails for a No-Maintenance Backup
If you don’t want to worry about reapplying polish or fixing chips, bring press-on nails as a backup option.
Today’s press-ons look just like salon nails and last for up to two weeks!
Why Press-Ons Are Perfect for Travel:
✔️ No drying time – Instant, perfect nails.
✔️ Easy to remove – Just soak in warm water and gently peel off.
✔️ Variety of styles – Choose from minimalist nudes to intricate designs.
💡 Pro Tip: Bring an extra set so you can swap styles mid-trip.
🔗 [Recommended: A set of reusable, travel-friendly press-on nails.]
Final Thoughts: Keep Your Simple Spring Nails Fresh & Travel-Ready
Keeping your simple spring nails fresh while traveling doesn’t have to be difficult.
With the right prep and maintenance, you can enjoy flawless nails throughout your trip without constant touch-ups.
Your Travel Nail Care Checklist:
✅ Apply a long-wear top coat every few days for chip resistance.
✅ Carry a glass nail file for emergency fixes.
✅ Moisturize with cuticle oil & hand cream to prevent dryness.
✅ Choose lighter, chip-resistant nail colors.
✅ Pack nail polish remover wipes for easy polish changes.
✅ Bring press-on nails for a quick, no-maintenance backup.
Now, you’re ready to explore the world with picture-perfect nails!
💬 What’s your favorite travel nail tip? Drop your go-to tricks in the comments below!
Final Thoughts: Effortless Nails for Every Travel Adventure
With the right products and techniques, you can achieve simple spring nails that look stunning and stay flawless throughout your travels.
Whether you go for soft pastels, chic nudes, or minimal nail art, these easy DIY tips will keep your manicure fresh and photo-ready.
So, next time you pack your travel essentials, don’t forget your nail care must-haves—because beautiful nails should never take a vacation!
💬 What’s your go-to nail color for spring travel? Share your favorites in the comments!
Related Articles:
Pastel Sunsets & Turquoise Waters: The Best Spring Break Aesthetic Beaches
As an Amazon Associate, I earn from qualifying purchases.